Groups are only available on Lightdash Cloud Pro and Enterprise plans.For more information on our plans, visit our pricing page.
Organization Settings > Users & groups tab. Only users with an organization admin role can manage groups.
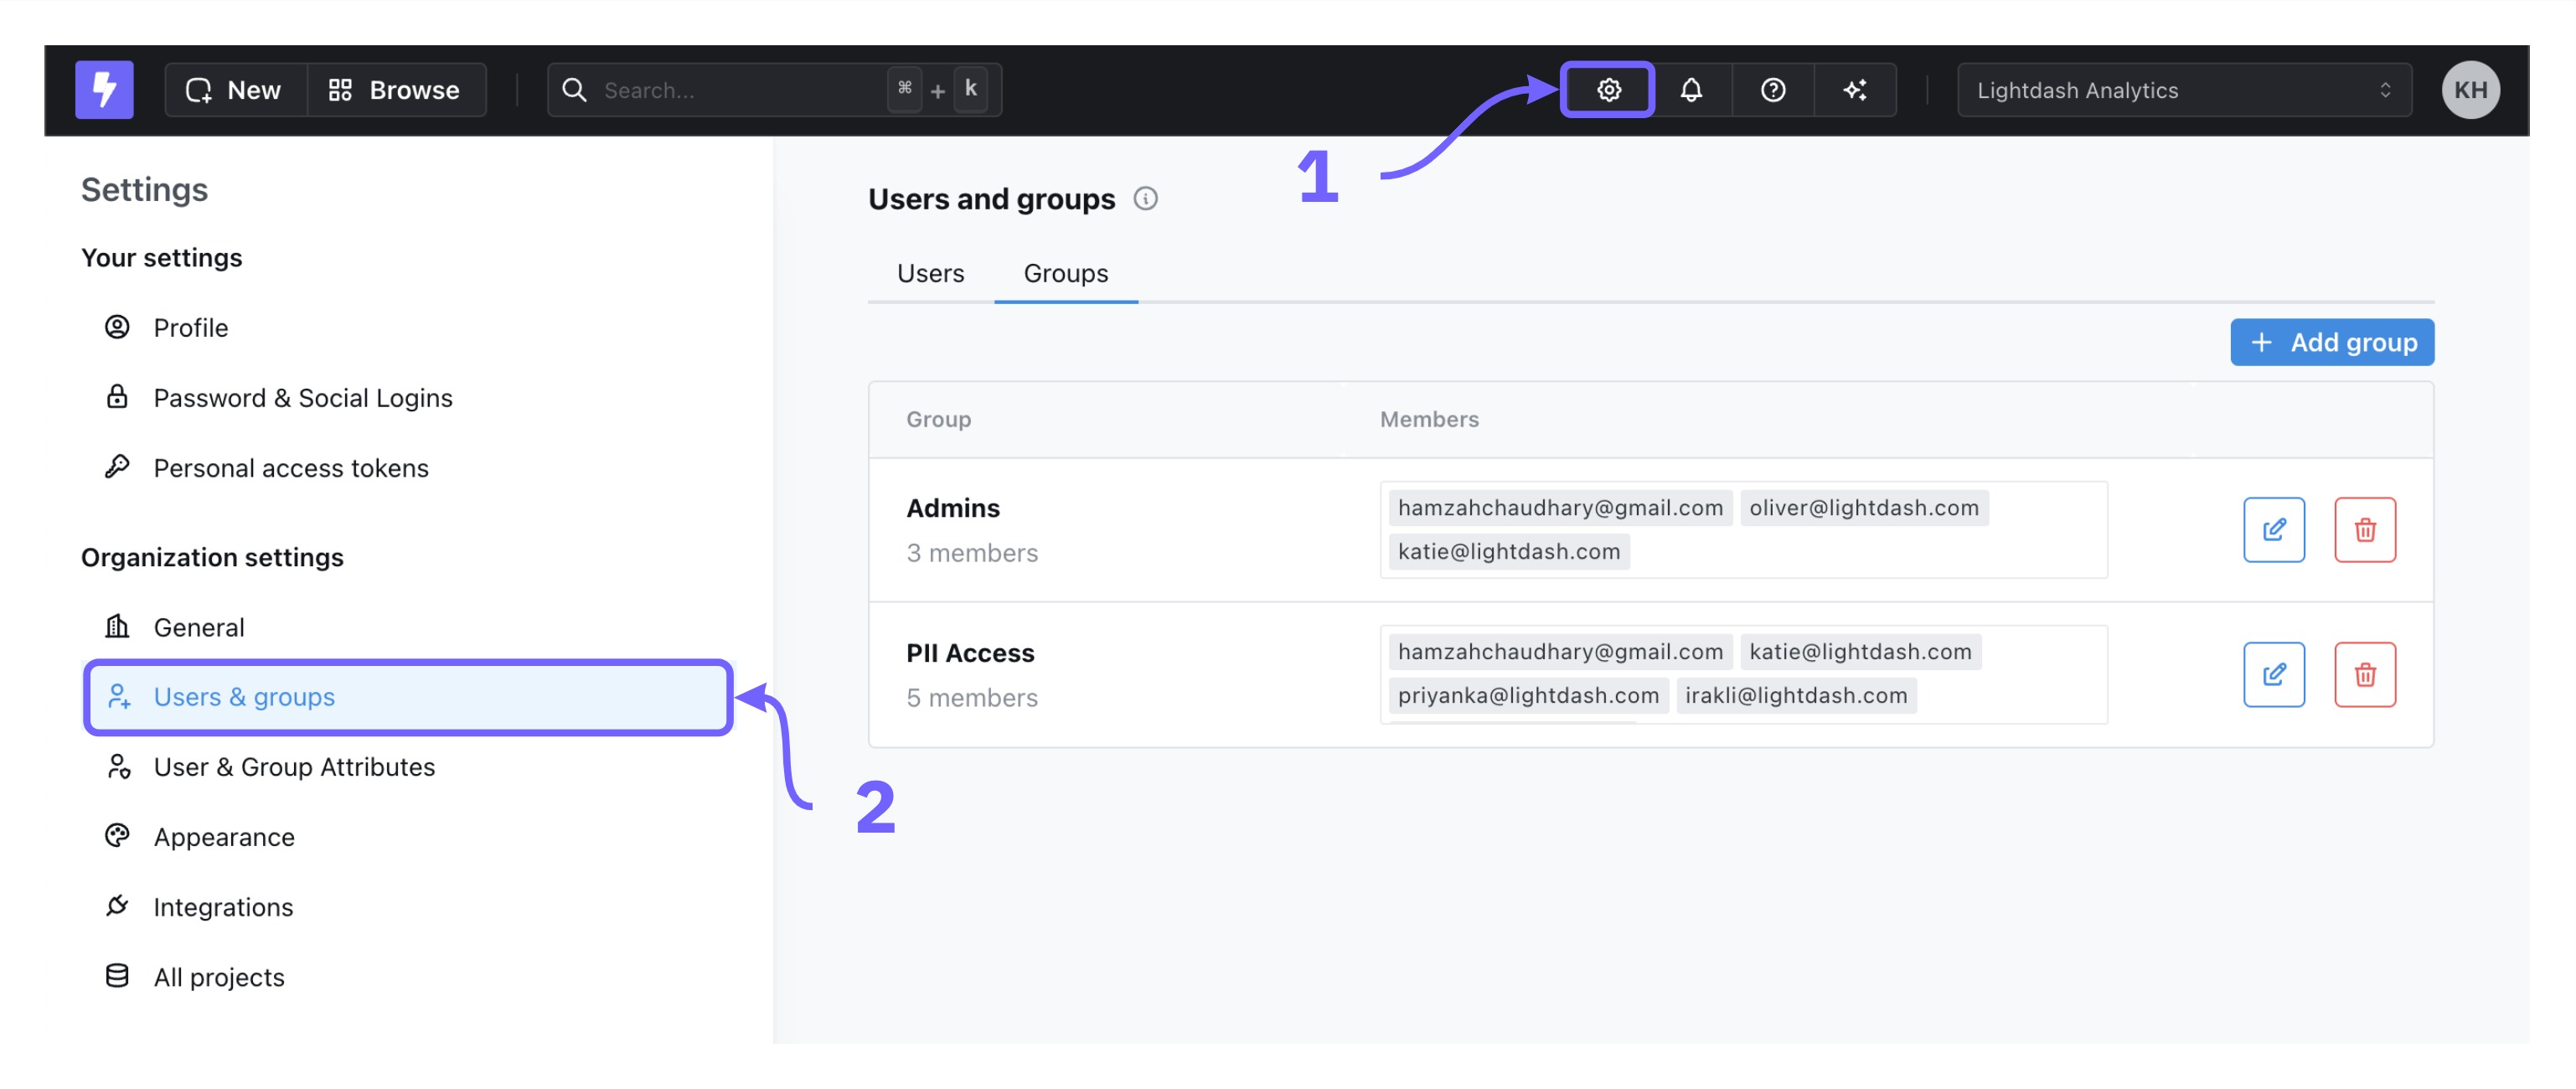
Creating groups
To create a new group, go toOrganization Settings > Users & groups > Add group. You can name your group and add users in your organization to the group. By default, newly created groups don’t have access to anything.
Editing groups
To edit a group, click on the edit button to the right of a group in the list. You can add or remove users from a group and change the group name. To remove someone from that group, click on thex to the right of the group member.
Deleting groups
To delete a group, click the delete icon to the right of a group in the list to remove it.Adding roles to groups
To assign a role to a group, use theProject access page in the Organization settings menu. From there, you can assign a group or groups to a role which determines their access to the project. For more information, see the Project roles page.
Assigning user attributes to groups
You can assign user attributes to groups as well as individual users. To learn more about managing data access for groups using user attributes, check out the user attributes docs here.Using OKTA to manage groups in Lightdash
If your Lightdash instance is configured to use OKTA as an authentication provider, then users will automatically be assigned to the same groups in Lightdash as they are in OKTA. See the guide to setting up OKTA for more information on setting the correct environment variables as well as Okta configuration: with/without custom authorization server.Note that users will only be assigned to groups that exist in Lightdash (groups won’t be created automatically) and exactly match the name of the group in OKTA.
- Setup groups in your directory in OKTA
- Allow groups to login in to Lightdash from Okta
- Finally for group sync to work you need to configure Okta to share groups with Lightdash